-1.JPG)

I know that's not the original verse but I couldn't help myself. Itsy Bitsy is one of our favorite tunes in this house and when I recently got my hands on some super cute Halloweenie fabric I knew one of the spooktacular creations I wanted to make had to have an 'itsy bitsy' on it.
This is kind of a mini tutorial. I am not going to go into too much detail because there are a few bib toots out there and I don't have anything too incredibly special to add......except for Mr. Spider.
Materials needed:
1/4 (not even that much) yard main fabric piece
1/4 (not even that much) yard back fabric piece
Batting, thread, little scissors, sewing machine, sew on velcro
1. First, you will want to use a bib that you like the size and fit of to trace on your fabric. If you don't exactly like something about the bib then change it up when you are using it as a pattern. Mine was a little smaller than I would like so I allowed for that when tracing it. You will also need to allow for about a 1/2" seam allowance when sewing. You are only doing this on the main, or front, piece of the bib.
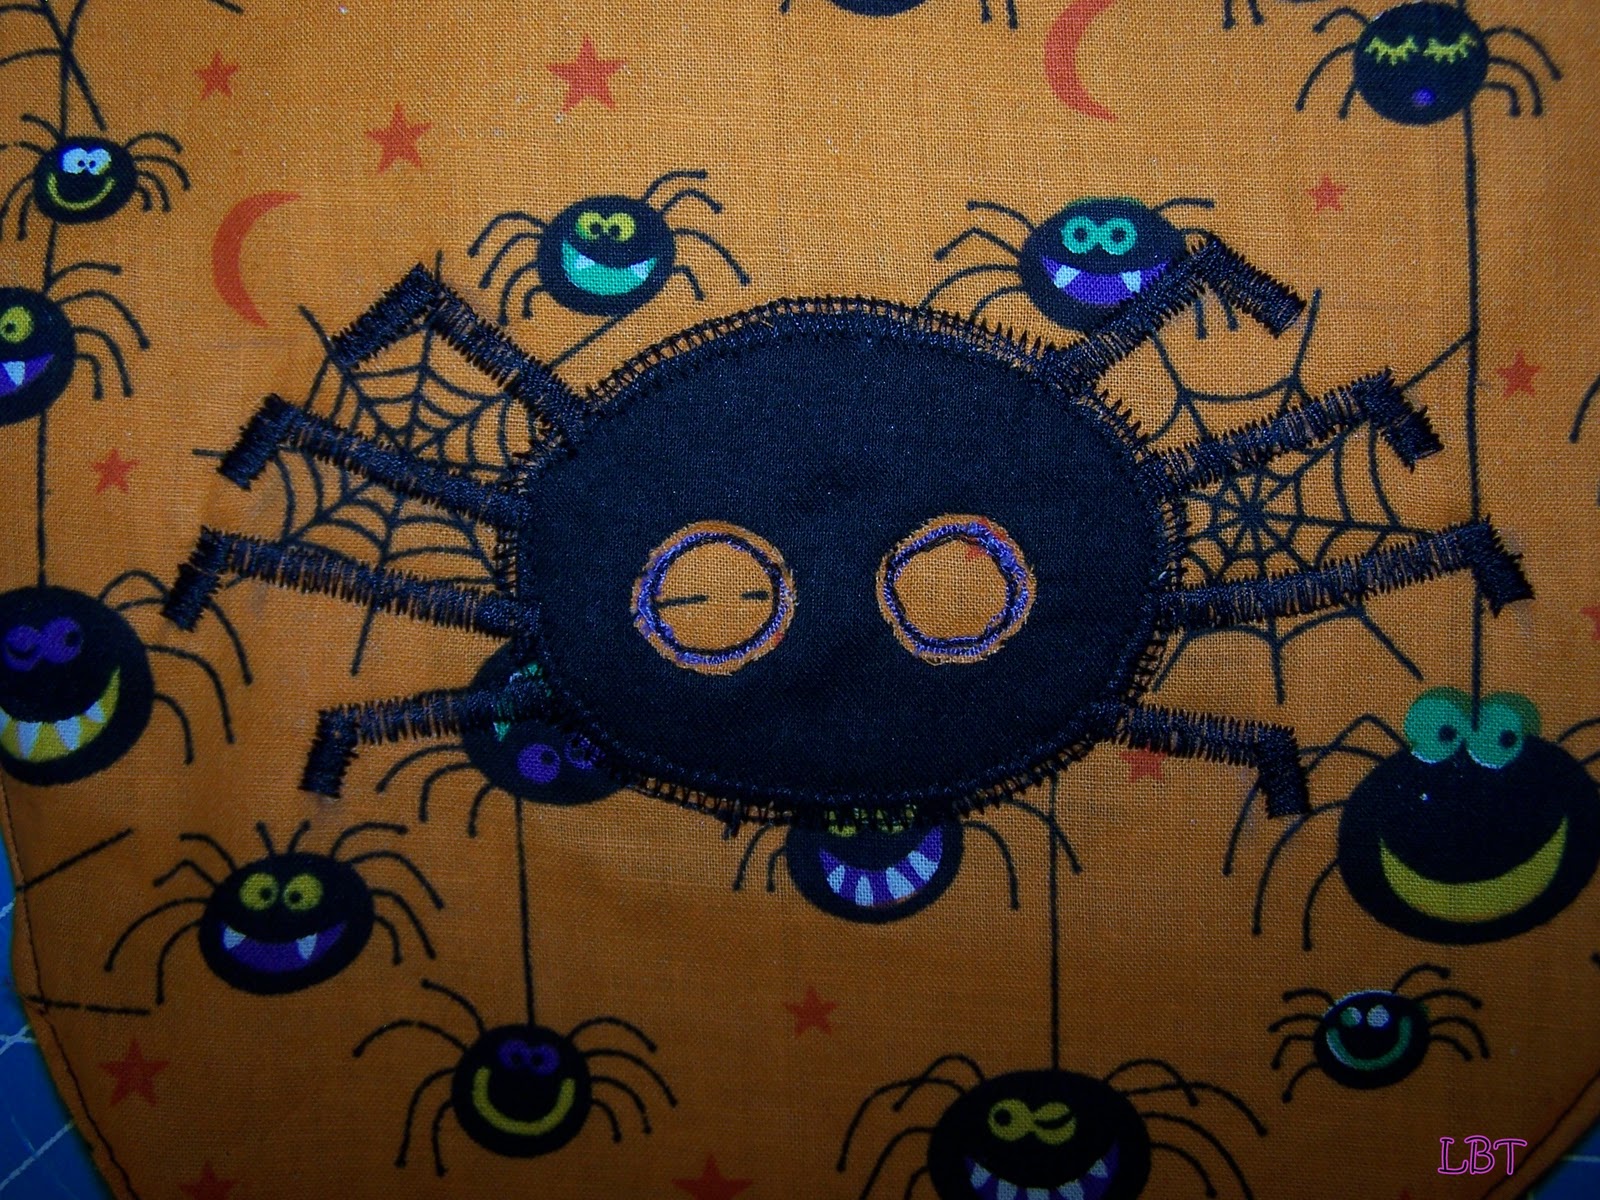
2. Mr. Spider happens to have started as a reverse applique'. I totally dig the whole reverse applique' thing especially paired with an applique' (which just means that I go back over the reversed one). You might think that's a little pointless but I love the depth it gives the creature, or whatever it is you are applique'ing ;) If you do a reverse applique' this is the time to do it, after you have cut out the main piece.

To reverse applique', simply cut out a piece of fabric larger than your intended design (Mr. Spider in my case), this fabric is best if it is a great contrast from your main fabric (like how I used black for my spider body-the black is a great contrast, and complement, to the orange spidery main fabric. sorry I did not show my black fabric in a seperate pic!) Then iron a piece of fusible interfacing to the backside of your contrast fabric. Trim to desired size. Next, you are going to pin the fabric with the interfacing to the wrong side of the piece you are applique'ing. Pin the interfacing side up. Then draw out whatever design you are doing on that piece of interfacing you just ironed on. Now, with a small stitch (I use a 1 on my machine), sew all of the lines you just drew onto the interfacing at least 3 times. You are literally looking at the interfacing when sewing and doing a 'tracing' of all the lines you drew with your needle and thread about 3 times over. You should really try to keep your threads connected when moving on to the next spot (ie, on mr.spider, from the main circular body to the little eyes). I did not do that this time. I was having some needle issues (and operator error). When you're done 'tracing' your line a few times you would simply pick up your needle, pull out the fabric just a little bit and line up your needle with the next spot to 'trace'. This gives it a little more assurance that threads won't pull out. I ended up having to go over my lines about 5 times so I am not too worried about that...famous last words, right? Finally, you will turn your fabric over and cut away the material around all of the spots you just sewed.

 3. This bib has a layer of batting in the middle. I layed my front bib piece down on the batting and pinned it in place. After it was pinned I just went ahead and cut the batting around my pinned piece leaving around a 1/2" allowance. This is because when you sew the batting sometimes it will 'shrink' or change in size a little bit.
4. Now you can either go ahead and sew the batting to this piece right now (just make sure the batting is on the wrong side of your fabric) or you can cut out the piece for the back of the bib and then sew all 3 at the same time...which is what I did. Use a 1/4" seam allowance and leave an opening, about 1-1/2", somewhere in the bib to turn it right side out. Oh, do the same method with your back piece, pin your front piece to it and just cut. If you plan it right you can have everything pinned and ready to sew in minutes!

In this pic you can see my front piece is wrong side out with it's right side facing the right side of the back piece. I have my batting pinned to the wrong side of the back piece. So in my layer sandwich it goes: front piece, back piece, batting (with the front and back pieces right sides together).

Here you can see what it looks like from the back after the bib sandwich has been stitched. See my opening for turning at the bottom left?

And here it is from the front. Be sure to trim your batting to match your front and back pieces now that the bib sandwich has been sewn.
5. After you've trimmed your batting go ahead and trim the corners of the bib up around the top where the neck straps meet so that there is less bulk when turning the bib right side out. I actually trim the entire thing coming close the stitch to allow for a neater looking bib. I feel like the less bulk the better. If you do this just make sure you don't trim too close to that stitch or it will pull out. Now gently turn it right side out through the opening you left. No pics for this but I'm sure you know what I'm talking about. I would iron it at this point as well to help it lay flat and allow for ease when top stitching.
6. Top stitch around the entire bib folding in the area that you left open for turning so that you close it completely up. Sorry, no pic for this either.
 7. Add some sew on velcro.
8. Final step, applique'!!! I used a basic zig zag stitch for the spider legs. I just drew right onto the bib the leg placement and followed that along with a 1/2" zig zag. I also zig zagged around the body of the spider creating some depth.
Love him!
Please leave me a comment and let me know if something wasn't clear or if I can help explain anything a little better for you. I am totally visual so I get it if something didn't click!!!
And please, please, please, I would love pictures if you make a fun bib of your own!


This is very cute! I'm a huge Halloween nut. Thanks for stopping over at MJ&G!
ReplyDeleteI. LOVE. IT. Ohmygawrsh I love this spider! I love that you made his legs! I love everything about it!
ReplyDeleteSo cute!!! Thanks for linking up to Thrilling Thursday @ Paisley Passions :)
ReplyDeleteahh so cute! Just love the name of the post too!Hello there. I am a new follower via Blog Hopping.Please visit @ http://www.mommiesandbeyond.com
ReplyDeleteHave a great weekend!
So cute. If I only needed a bib. {No, that's not going to happen.}
ReplyDelete